A bouquet of paper flowers never wilts, never needs water, and can be made in any color you dream up. They are one of the most rewarding paper crafts for beginners because the results look so much harder than they actually are. Let's grow a few blooms from nothing but paper.
The Charm of Flowers That Never Fade#
Real flowers are lovely, but they fade within days. Paper flowers stay perfect for years, which makes them wonderful for decorating a shelf, brightening a gift, or building a backdrop for a celebration. You can match them to a color scheme exactly, and you will never have to throw a sad, droopy bouquet in the bin.
They are also endlessly adaptable. The same basic techniques scale from tiny blossoms that fit on a card to giant statement flowers as big as your head. Once you understand how petals layer and curl, you can invent your own varieties and color combinations to your heart's content.
For beginners, paper flowers hit a sweet spot. They look impressively intricate, yet most are built from a few simple repeated shapes. That gap between how they look and how they are made is exactly why they make such a satisfying project. They are also a thoughtful, allergy-friendly gift, and a single handmade bloom tucked into a card or tied onto a present feels far more personal than anything from a shop. Once you start making them, you will find excuses to give them away.
Picking the Right Paper#
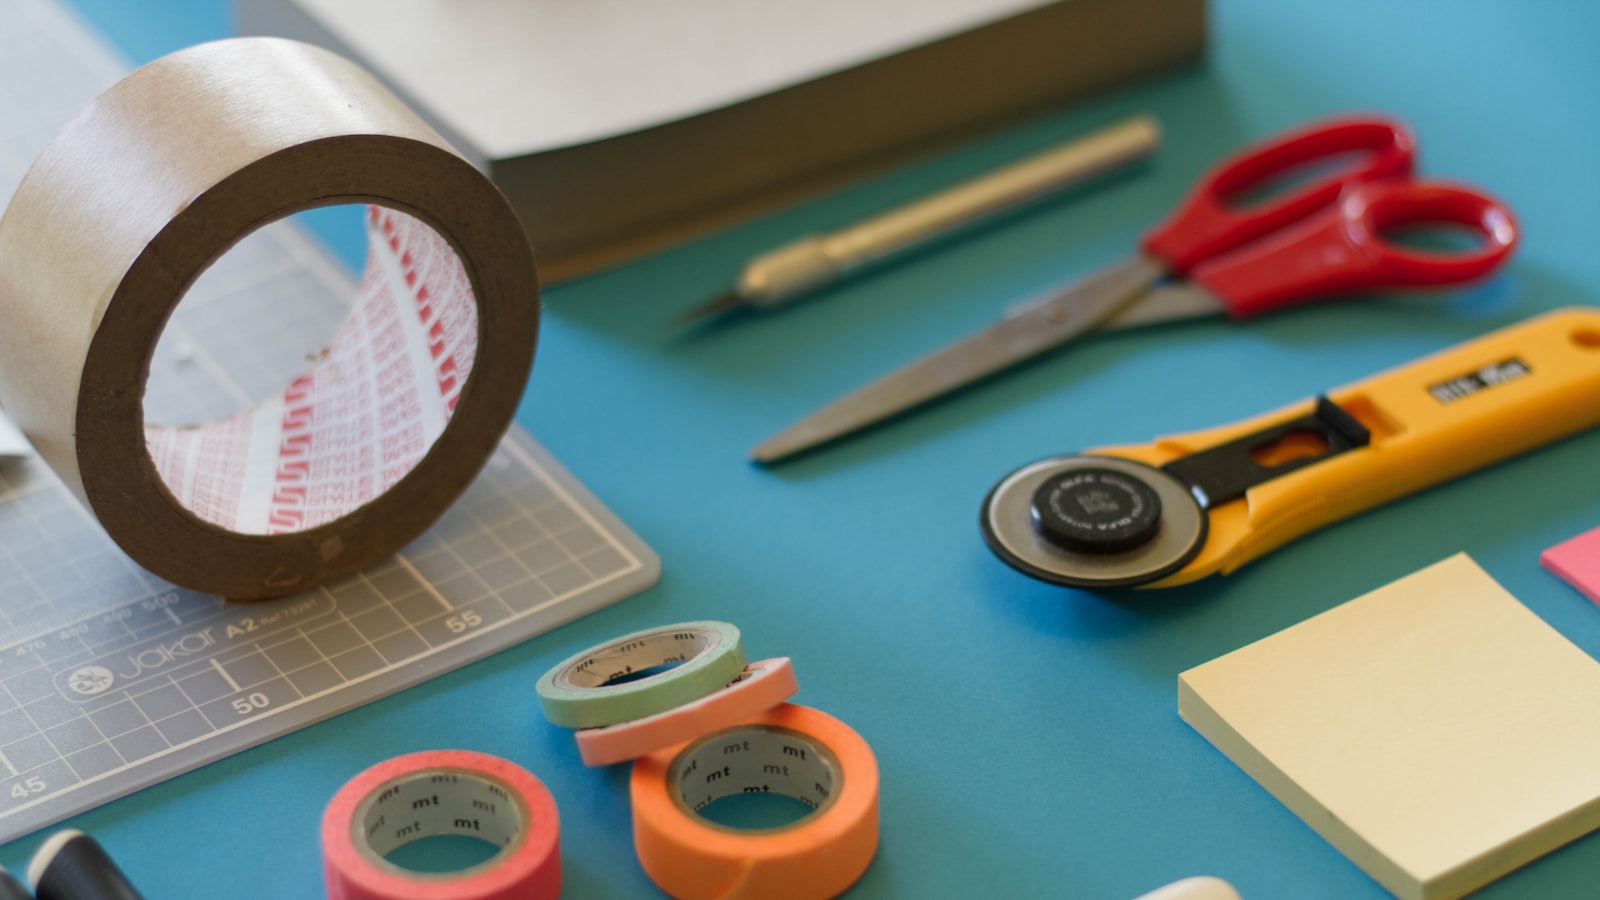
Your choice of paper sets the whole mood of your flowers, so it is worth a moment's thought. Each common type gives a different feel, and there is no single right answer, only the look you are going for.
- Crepe paper stretches and curls beautifully, giving the most realistic, lifelike petals
- Cardstock holds bold shapes well and is perfect for crisp, modern, graphic blooms
- Tissue paper is soft and airy, ideal for fluffy pom-pom style flowers and big bouquets
- Regular printer paper is a perfect, free choice for practicing before you commit nicer stock
If you are just starting, grab a few sheets of ordinary paper and a single pad of cardstock. Practice your shapes on the cheap stuff, then move to nicer paper once your hands know the moves. There is no need to buy expensive specialty paper before you have made your first flower.
Whatever you choose, you will be cutting a lot of petals, so keep your scissors sharp and comfortable. Cut on a flat surface and away from your fingers, and if children are crafting with you, set them up with safety scissors. Should a project call for floral wire stems, tuck the sharp cut ends down with tape so nobody gets scratched.
The Petal Techniques That Make Them Look Real#
The difference between a flat paper circle and a flower that looks alive comes down to a few small shaping tricks. None of them are difficult, and they transform your results instantly.
The most important is curling. Take a cut petal and gently run it over the edge of an open scissor blade, or wrap it around a pencil, to coax in a soft curve. Flat petals look like cutouts, but curled petals catch the light and read as real. Curl the tips outward for an open, blooming look, or inward for a tighter bud.
Shaping the petal outline matters too. Rounded petals feel like roses and peonies, while pointed petals suggest lilies or daisies. Cutting a tiny notch or fringe along an edge adds texture and softness. Try cupping a petal by gently stretching its center between your thumbs, which gives crepe paper in particular a lovely three-dimensional bowl shape. It helps to cut several petals at once by stacking a few sheets together, which keeps your shapes consistent and saves your hands on bigger bouquets. Just go slowly so the layers do not slide.
Never skip curling your petals. That one small motion is what turns flat paper shapes into flowers that look like they could fool a bee.
Making Your First Paper Rose#
A rolled paper rose is the perfect first flower because it is forgiving and genuinely stunning. Start by cutting a circle of paper, roughly the size of your palm. The exact size is not important, since bigger circles make bigger roses.
Now cut a spiral into that circle. Begin at the outer edge and cut a smooth, curving line that winds its way inward, like drawing a snail's shell, until you reach the center. Make your spiral path nice and wide, around an inch across, so you have plenty of paper to work with. You will end up with one long, curly strip still attached at the very center.
Starting from the outer end, begin rolling the strip tightly around itself. Keep rolling, letting the coil build up, until you reach the center pad you left in the middle. When you let go, the coil will relax and bloom open into petals. Apply a dab of glue to that center pad and press the bottom of your rolled coil down onto it to hold everything in place. Adjust the petals with your fingers, curling the outer edges back, until you are happy. That is a complete rose, and once you have made one, you will want a whole bouquet. If your first rose looks a little tight or a little loose, do not worry, because the next one will be better. Each rose teaches your hands the right tension, and within three or four you will have it.
Filling Your Vase#
The joy of paper flowers is that you can keep them forever and make exactly as many as you like. Start with that simple rolled rose, then branch out into layered blooms, tissue pom-poms, and your own invented varieties as your confidence grows. Mix sizes and colors in a single vase for a bouquet that looks gathered from a wild, impossible garden.
Keep your scraps, because small offcuts become buds, leaves, and confetti. Gather a handful of finished flowers and you have an instant gift topper, a piece of wall art, or a centerpiece that will still be smiling long after fresh flowers would have faded. So cut your first circle, roll your first rose, and start a garden that never needs watering.